
Note: These instructions refer to the FTP server for Bill Barrett's class "Digital Photo Imaging." If you are in a different class, please be sure you send your files to the correct directory on the FTP server!
"FTP," File Transfer Protocol, is a means of sending any type of file, even those that cannot be displayed in a web browser, using the Internet. Although there are many free or inexpensive FTP programs available for download (e.g. Adobe Fetch, WS_FTP, etc.), for this class we will use the FTP capabilities that are part of our normal browsers. Although they have limited functionality, they work well for our purposes. This page demonstrates using FTP with Microsoft Internet Explorer. (For Netscape Navigator, click here.)
[Should you wish to find a more powerful FTP program for your own computer, a good place to look is TUCOWS, "The Ultimate Collection of Winsock Software." Type FTP in the blank search box at the top of the screen, specify your operating system in the Software drop-down box, and you'll find many choices.]
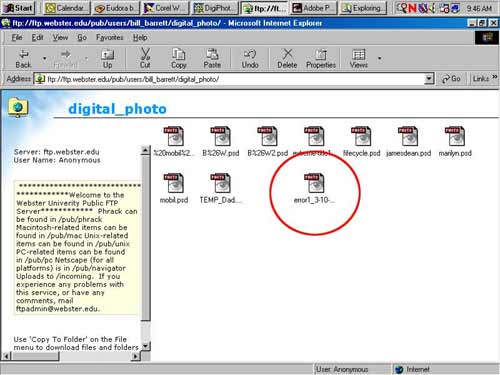
Here are step by step directions. When you go to the "FTP server" (the machine to which you will send files) for this class, your screen will look something like this:
Notice that the address line starts with ftp:// instead of the more customary http://. This is a good sign that you're in the right place. (We try to keep the server relatively uncluttered, so after each issue, the files that have already been sent are moved to the archive folder. They are also being saved off-line, and will remain available to the photographer.)
Now open a view of the disk where you want to move a file from. With the Windows operating system, this is easily done by opening the Windows Explorer (Start, Programs, Windows Explorer.)
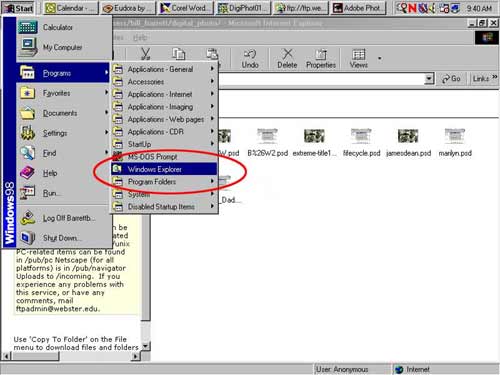
You may also view the disk by double clicking on My Computer. With the Macintosh operating system (versions up to but not including OS X), double click the disk in the Finder.
Now select the file on your own computer,
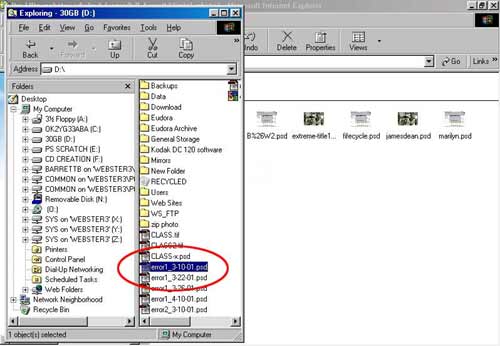
and drag it to the remote server.
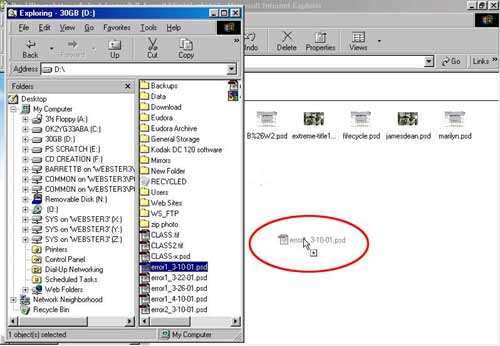
You should see a gray progress bar at the bottom of the screen as your file is being sent. The file will appear on the FTP server when you click Reload in the browser.
That's all there is to it!
A few logistical notes:
This server is configured to allow you to send files, and to download them back to your own computer, but not to delete them. That's to prevent accidental erasure of a file. If you should happen to send a file that doesn't completely transfer (there are occasional "blips" in the Internet that will cause a file to be corrupted in transit), or you want to send a file again, you need to rename it at least slightly so that the machine will see it as a new file name. Try adding a number or letter to the end of the file name.
Some notes on naming files: Be sure that your name is the
first part of the file name. This not only helps identify the files on the server,
it helps me sort them logically. Do not use spaces in any file names;
use the underscore
( _ ) instead. If you need to temporarily store a file on the FTP server but
wish to continue to have access to it, please put TEMP in uppercase letters
as the first part of the file name, so that it doesn't get saved off-line.
To move a file from the FTP server to your own local computer, right-click (Windows) or click and hold (Macintosh) on the file name, then choose "Save Link As..." and specify where you want to save it.
More questions? Let's talk about it in Pandora.
Click here to go to the FTP server.